
Tip & Trick
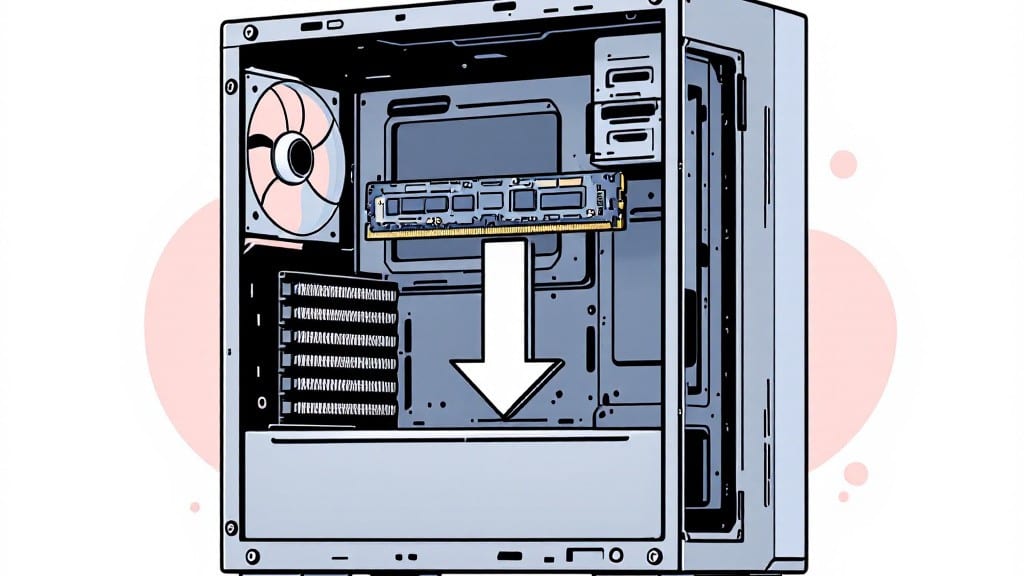
Installing RAM in a desktop PC is faster than you think—no tools needed, just patience. I’ve done this dozens of times, including that first time in my uncle’s basement workshop where I dropped a stick twice before getting it right.
The key is matching the notch on the RAM stick with the slot in the motherboard, and avoiding static discharge by touching the case before handling components.
You’ll need compatible RAM (check your motherboard’s manual for DDR4 vs. DDR5), the right amount (usually 16GB or 32GB for modern systems), and a flat surface to work on. Most modern RAM clicks into place with a satisfying snap—no force required.
If it doesn’t seat properly, you’ll hear a warning beep during boot or see an error in BIOS, which is easily fixed by reseating the stick.
Performance jumps immediately after installation—games load faster, apps open in seconds, and multitasking feels smoother. The trickiest part is ensuring both sticks (if using dual-channel) are identical in capacity and speed. My first build used mismatched RAM, and the system barely ran—lesson learned the hard way.
If your PC still doesn’t detect the RAM, double-check the slot (some motherboards have specific slots for dual-channel setups) or reset the BIOS. Most modern systems auto-detect new RAM, but older ones might need a quick CMOS battery reset. Once it’s in, you’ll wonder why you didn’t upgrade sooner.
📚 In This Guide
- What you need
- Instructions
- Tips and common mistakes
- Wrapping up and next steps
What you need
- ● RAM module(s): Ensure compatibility with your motherboard (check for DDR4/DDR5, capacity, and speed). Pro tip: Match the existing RAM’s specs if upgrading!
- ○ Anti-static wrist strap (optional but recommended): Protects components from static damage. A grounded surface (like a metal desk) works too!
- ○ Phillips-head screwdriver (optional): Only needed if your RAM slots have screws (rare for modern PCs).
- ● User manual or motherboard documentation: For reference if your PC’s design is unfamiliar.
- ● Power off your PC and unplug it from the wall (safety first!).
- ● Work in a clean, static-free environment (avoid carpets—static builds up easily!).
- ● Ensure your motherboard supports the RAM type/size you’re installing (check specs online or in BIOS).
- ● Compressed air: For cleaning dust from slots or heatsinks.
- ● Flashlight: Helps spot tight slots or hidden labels.
- ● Notepad: To jot down existing RAM configurations (if unsure).
Step-by-Step instructions for installing RAM in a desktop PC
Here's how to upgrade your system memory safely and efficiently—no tools required.
Power Down and Prepare Your System
First, shut down your desktop completely and unplug the power cable from the back. I always hold the power button for 5-10 seconds after unplugging to discharge any residual energy—this prevents static shocks that could damage sensitive components.
Ground yourself by touching the metal frame of your case before handling any internal parts. This simple step ensures you don't accidentally discharge static electricity onto the RAM modules or motherboard. Open the case by removing the side panel screws—most modern cases use thumbscrews that can be loosened by hand.
Locate and Remove Existing RAM
Find the RAM slots on your motherboard—these are long, rectangular connectors with clips on either side. If you have existing RAM installed, gently press the clips outward until they release. The modules will pop up slightly—lift them straight out of the slots at a 45-degree angle to avoid bending the connectors.
Set the removed RAM aside in a safe place. If you're upgrading, you'll typically install the new modules first before reinserting the old ones. Check your motherboard manual for the recommended slot pairing—most systems use slots 2 and 4 for dual-channel configurations, but this varies by model.
Align and Insert New RAM Modules
Take your new RAM and align the notch on the bottom edge with the corresponding slot on the motherboard. The notch ensures proper orientation—if it doesn't match, you've got the module upside down. Press firmly downward until the clips on either side snap into place.
You'll hear a distinct click when the module is fully seated. If it doesn't click or feels loose, remove it and reinsert it at the correct angle. Never force the module—this can damage both the RAM and the motherboard socket. For dual-channel setups, insert the second module into the paired slot.
Reassemble and Boot Up
Close the case side panel and reconnect the power cable. Before powering on, double-check that all connections are secure and no cables are obstructing the RAM modules. Plug in the monitor and peripherals, then press the power button.
Enter your system BIOS or UEFI setup (usually by pressing Delete or F2 during boot) to verify the new RAM is detected. Look for the memory capacity and speed—your system should now show the full 16GB (or your installed amount) at the correct DDR4-3200 (or your module's specification).
Confirm Performance in Windows
Once in Windows, open Task Manager by pressing Ctrl+Shift+Esc. Go to the Performance tab and check the Memory section to confirm the new capacity. Run a quick benchmark using Windows Experience Index (type "performance" in the search bar) to ensure your system recognizes the full upgrade.
If Windows doesn't boot or shows memory errors, reseat the RAM modules and ensure they're fully clicked into place. Most issues stem from improper seating—take your time to get it right the first time.
Tips & tricks for faster RAM installation
Here's what I've learned from installing RAM in dozens of systems—these little details make all the difference between a smooth upgrade and a frustrating experience.
Grounding is Non-Negotiable: I can't stress this enough—static electricity is the #1 enemy of RAM installation. Beyond just touching the case frame, I recommend using an anti-static wrist strap if you have one. Even better, work on a carpeted floor (the static builds up in your body and dissipates harmlessly through the floor). In Step 1, that 5-10 second power button hold isn't just about safety—it's your first line of defense against static discharge.
The 45-Degree Angle Secret: When removing or inserting RAM in Step 2 and Step 3, that 45-degree angle isn't arbitrary—it's physics. The angle prevents the connectors from bending while allowing the clips to release cleanly. I've seen people try to lift straight up and end up with bent pins that ruin both the RAM and motherboard. Take your time here, and you'll avoid costly mistakes.
Listen for That Click: In Step 3, that audible click when the RAM seats properly is your confirmation that everything's aligned correctly. If you don't hear it or feel resistance, stop immediately. I've had students force modules in, thinking more pressure would help, only to damage their systems. The RAM should go in with firm but gentle pressure—no muscle required.
Dual-Channel Pairing Matters: When installing two modules in Step 3, remember that slots 2 and 4 are typically paired for dual-channel configurations. Your motherboard manual will specify the exact pairing, but this is why you see RAM modules sold in matching pairs—it's not just about capacity, it's about performance. Installing them in the wrong slots can actually slow down your system instead of speeding it up.
Pro Tips for Install Ram In A Desktop Pc
- Here's what I've learned from installing RAM in dozens of systems—these little details make all the difference between a smooth upgrade and a frustrating experience.
- Grounding is Non-Negotiable: I can't stress this enough—static electricity is the #1 enemy of RAM installation.
- The 45-Degree Angle Secret: When removing or inserting RAM in Step 2 and Step 3, that 45-degree angle isn't arbitrary—it's physics.
Frequently asked questions
Got questions about upgrading your RAM? Here are some of the most common ones—plus quick answers to keep you on track!
Do I need to turn off my PC before installing RAM?
Yes! Always power down your PC, unplug it, and ground yourself (touch a metal part of the case) to avoid static electricity damaging your RAM or motherboard. Safety first—no shortcuts!
Can I mix RAM kits with different speeds or brands?
Technically yes, but it’s risky. Your PC will run at the slowest RAM speed in the kit, and mismatched brands may cause instability. For best results, stick to identical kits or check your motherboard’s QVL (Qualified Vendor List).
How do I know if my RAM is installed correctly?
Look for these signs:
- LED lights on the motherboard (check manual for location).
- Your PC boots normally (no beep codes or errors).
- Task Manager shows the correct RAM amount (Windows: Ctrl+Shift+Esc).
What if my PC won’t turn on after installing RAM?
Don’t panic! Try these fixes:
- Reseat the RAM sticks—push them firmly into the slots.
- Check if the RAM is fully locked (you should hear a click).
- Test with one stick at a time in Slot 1 (or Slot A, depending on your motherboard).
- If still dead, the RAM might be faulty—try it in another PC.
Is it better to install RAM in pairs (dual-channel) or alone?
For most modern motherboards, installing RAM in pairs (e.g., Slots 1 & 2 or 3 & 4) enables dual-channel mode, which boosts performance. However, single sticks will work—just expect slightly slower speeds. Always match the color-coded slots on your motherboard.
Wrapping up and next steps
You’ve just unlocked a game-changing upgrade for your PC! Installing RAM is simpler than you thought—no fancy tools or technical expertise needed. With just a little patience and the right steps, you’ve boosted your system’s speed, multitasking power, and overall performance. 🎉
Now that your RAM is securely in place, the next logical step? Put it to the test! Run a quick system benchmark (like Cinebench or Geekbench) to see your newfound speed.
Want to go further? Explore other upgrades like SSDs or a fresh coat of thermal paste—your PC’s potential is limitless!